There are more fishing knots than anyone could ever memorise. Uni knot, nail knot, triple surgeon’s, the various “fisherman’s” knots your grandfather swore by — every angler settles on their own set. But when I go shore jigging, the connection between my leader and the solid ring is the one I refuse to improvise on. That is the joint that has to survive a big fish taking the leader into its mouth, or a metal jig scraping across rough bottom.
What I use is a Palomar knot finished with half hitches and an ending knot. It is not difficult, and it is very strong. This guide walks through all three stages, including the tightening tricks that most people miss.
Because if I had to sum up strong knots in one sentence, it would be this: strength comes from spreading the load evenly, and that comes down to how you tighten.
Why the Palomar knot for shore jigging
Two reasons.
It doubles the line through the ring. The connection is made with doubled leader, so the load is shared across two strands rather than one.
It still cinches down properly in heavy leader. Shore jigging often calls for 50 lb to 80 lb leader depending on the ground you are fishing. Plenty of knots become almost impossible to seat properly at that diameter. I have tested the Palomar up to 100 lb nylon and it still closes down cleanly if you put some force into it.
My own routine: the first rig of every session gets a Palomar plus half hitches. Later on, if I am fishing water where a big fish is unlikely, or the bite is on and I want a lure back out now, I switch to a quicker knot. But the first one is always this.
A setup trick before you start
Attach the solid ring to a metal jig via a split ring before you tie. Even if you plan to throw a pencil popper, tie with a jig attached.
The reason is grip. When you tighten, you need something solid to pull against, and a bare solid ring is hard to hold. A jig gives you a handle, and it makes it far easier to balance the knot as it forms.
If your half hitches keep coming out crooked, try this once — it fixes the problem for a lot of people. A carabiner or a pair of pliers works just as well.
Leave the hooks off. Tying with assist hooks attached is asking for a hook in the hand.
Part 1: Tying the Palomar knot
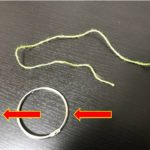
Double about 20 cm of leader
The Palomar is tied with doubled leader, and that is where the strength comes from.
One thing matters here: do not crease the fold. If you pinch a sharp crease into the leader, you have weakened it at exactly the point that will carry load. Leave the bend rounded and open. It is slightly more awkward to work with, but it keeps the material intact.
Twenty centimetres is generous — you need enough tag end left over for the half hitches later. There is no exact rule. Too long only costs you a little leader.
Pass the doubled leader through the ring and tie a loose overhand
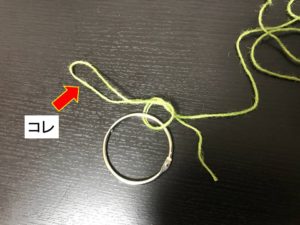
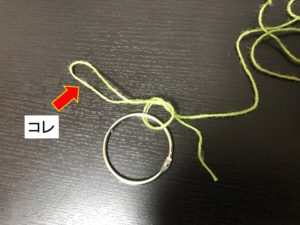
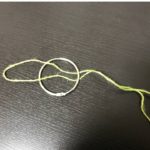
Thread the doubled leader through the solid ring, then tie a single loose overhand knot with the doubled section.
Do not tighten it yet. Pull just enough to keep the knot compact. You will be adjusting how the loops sit against the ring in a moment, so leave yourself room to work.
Pass the ring back through the loop
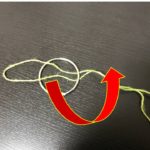
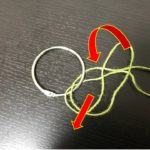
Take the loop at the end of the doubled leader and pass the solid ring — jig and all — back through it. Anyone who ever fitted a strap to an old mobile phone will recognise the motion.
Watch for twists in the leader as you do this. Then slide that loop down toward the main line side.
Check both strands before you tighten
This is the step people skip, and it is the one that matters most.
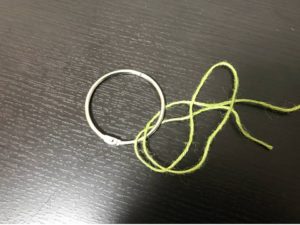
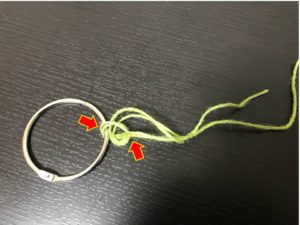
Confirm that both strands of the doubled leader are seated on the solid ring. If they have crossed over each other, the knot is no longer carrying load on two strands, and you have thrown away the entire advantage of the Palomar. Check where the leader contacts the ring, and check where the strands cross each other.
If anything is crossed, untie it and start again. It takes thirty seconds. Finding out mid-fight does not.
Tighten it — properly
Two stages.
First, hold both strands together and pull against the jig to seat the knot down onto the ring.
Then hold three points at once — the tag end, the standing leader, and the jig — and close the loop slowly. Picture the three points as corners of an equal triangle, and work them back and forth as you tighten rather than hauling in one direction.
With 50 lb fluorocarbon you can pull as hard as you reasonably can. Short of unusual strength, you are not going to break it, and a knot tightened hard is a stronger knot. Just stop short of twisting the line.
Protect your hands. A knot puller or a folded towel is enough. It matters even more when you are tying PE to fluorocarbon later on — that is where line cuts happen.
Personally I hold the tag end in my teeth, the standing leader in my right hand, and the jig in my left. That is the whole reason for attaching the jig in the first place.
That is the Palomar finished. Everything after this is about reinforcing it and protecting the leader where it exits the knot.
Part 2: Half hitches
What Japanese anglers call amikomi is simply a series of half hitches, alternating direction, finished off so it cannot unravel. The half hitch itself is the same motion as the first step of tying a shoelace bow.
Over, under, over, under, over — and so on. Losing track of which side you are on is genuinely annoying, so say it out loud as you go. “Over. Under. Over.”
The trick to keeping them straight
This is the most common complaint I hear: the wrapping comes out crooked.
The fix is to reset the leader straight after every single hitch, and to tighten in a “T” shape — the standing leader running straight, the tag pulling away at right angles. Because the axis of the leader never shifts, the hitches stack neatly instead of drifting to one side.
Standing on the jig with one foot helps you keep tension on the standing line while both hands work. It is not required, but it makes the T shape easy to hold.
Working through the hitches
After the Palomar you should have 15 cm or more of tag end left. Cross the tag over the standing leader, pass it through the loop that forms, and snug it down in the T position. Then cross under and repeat. Then over again. Keep alternating.
Here is the second trick, and it is counterintuitive: do not tighten these as hard as the Palomar.
The half hitches add strength, but the Palomar is still the load-bearing part of the connection. Snug them down firmly enough that they will not shift, but not so hard that the leader discolours. Over-tightening makes the wrap bend off-axis, and if you are strong-handed it can constrict and thin the leader underneath. Firm, not brutal — you should be able to do it without a knot puller.
How many?
Five to nine is the usual range. More hitches make the section above the lure stiffer; fewer leave it supple. There is no correct number, but be aware that an unnecessarily long wrap can dull the action of a jig.
Out of habit from tying FG knots I start on top and finish on top. With an FG that symmetry matters for load balance. Here, I suspect an even number would be perfectly fine.

Part 3: The ending knot
The ending knot locks everything in place so the hitches cannot unravel.
It is normally used to finish a PE-to-leader connection, where its low profile lets the knot pass through the guides smoothly on the cast. That particular benefit does not apply here — this knot sits down by the lure. But it is very resistant to coming undone, which is why I use it to close out the wrap on anything up to 50 lb fluorocarbon.
I will be honest: this is probably more than the job strictly requires.
Heavy fluorocarbon is hard to tie an ending knot in. If you try it and it is not working, just melt a small ball on the tag end with something hot instead. That is enough. A lighter works, but a coil lighter, a cigarette or an incense stick — something that is hot without a flame — is easier to control and less likely to cook the part of the leader you want to keep.
Cross and wrap three times
Continue straight on from the last half hitch. You should have 10 cm or more of tag left. Cross it over the standing leader — direction does not matter here, it is not alternating — and pass the tag through the loop. Repeat three times. (For a PE-to-fluorocarbon connection, use five.)
Work each wrap in order toward the solid ring. Then pull gently to close the loops down, keeping the leader axis straight, without disturbing the order you just built.
Unwind them back the other way
This is the part that is hard to describe in words, so read it with line in your hands.
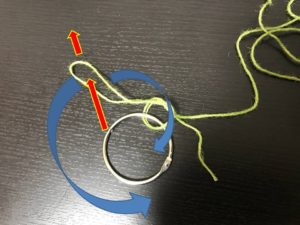
Those wraps you just made get rolled back off in the opposite direction and re-laid right next to the half hitches. Hold the loop of leader, and walk the wraps backwards one at a time, starting from the hitch side, until every one of them has migrated across.
When it is done, you will have a loop still standing at the tag end, with the tag emerging from inside the new coils sitting alongside the wrap.
Close it up
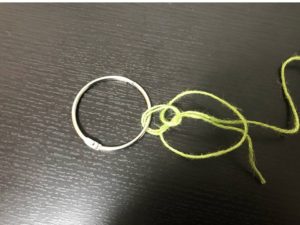
Nearly there. Hold the coils in place and pull the tag end to draw them tight. Then pull the standing leader and the tag together to seat everything, and trim the tag flush.
Do not burn a ball on the end of this one. You have just built a smooth, low-profile finish — melting a lump onto it defeats the purpose. This knot does not need one.
Where it goes wrong
The Palomar plus half hitches is a straightforward connection, but the details are not optional. Miss them and you end up with something no stronger than a uni knot, and it will let go at the solid ring — which is precisely where you cannot afford it.
- Creasing the fold when you double the leader — weakens it before you have even started
- Crossed strands on the solid ring — the doubling does nothing
- Under-tightening the Palomar — this one needs real force
- Over-tightening the half hitches — bends the wrap and constricts the leader
- Losing track of over and under — say it out loud
Get those right and it simply does not fail. Spend the extra minute at first light and you can fight fish without thinking about the knot at all.

Practise at home
Whatever knot you choose, learn it at the kitchen table rather than on the rocks in the dark with a wind blowing. This one especially — the ending knot makes very little sense the first time and becomes obvious around the fourth.
If you want something faster for when the fish are up and you do not want to spend three minutes tying, I use a quicker connection in those situations — though above roughly 80 lb it becomes hard to seat properly, which is where the Palomar earns its place.
More knots on this site:
- How to tie the Fire Knot — PE to leader, my go-to for eging
- How to tie the Perfect Knot — leader to snap, for eging


